


Welcome to the GFI AppManager User Guide. This guide is designed for users who are already familiar with the utility and benefits of AppManager and are looking to dive deeper into its functionality. Whether you're looking to optimize your appliance status monitoring, manage alerts more effectively, or explore the nuances of IP and URL group configurations, you've come to the right place. We cover essential aspects from Alerts and Notifications to Definitions and Backups, offering you a comprehensive look into what makes AppManager an indispensable tool for your organization.
Home
Appliance status
When the appliances are added to AppManager, you can see their status in the Home > Overview section. The status of the appliance is indicated by colors:
- Red: The appliance is offline or with some major issues.
- Green: The appliance is online.
From the overview page, you also get a summary of the Notifications that have been generated by the specific appliance grouped by status: Critical, Needs Attention, and Info.
- Use the
button to edit the name of the appliance or to assign it to a different account.
- Use the
button to delete the appliance from the account. This action is recommended only if the appliance has been uninstalled or if it is not working properly.
You can click on each of the appliances listed to be able to make configurations within the appliance. The options you get from the Manager for Kerio Control, Kerio Connect, and Archiver are the same options you can configure from each product administrator’s interface. For more information on the options that you can change, please refer to the manual of each product.
The notification section in AppManager will show all the notifications that have been generated by each appliance along with the following information:
- Date of the event
- Product
- Appliance Name
- Details of the event
- Type of Alert: Critical, Needs Attention, Info.
- Toggle the button to mark the notification as resolved/unresolved.
You can expand the notification to be able to see the Message related to the event. From this view, you can use the button to manage the alert that is triggering this notification or the
button to remove it.
You can use the button to filter the notifications based on different criteria.

From the configuration section, you can perform the following actions:
- Managing accounts
- Rename account
- Delete account (Coming soon)
IP addresses are identifiers assigned to devices connected to a TCP/IP Network. IP Address Groups can be used in other configuration dialogs throughout AppManager.
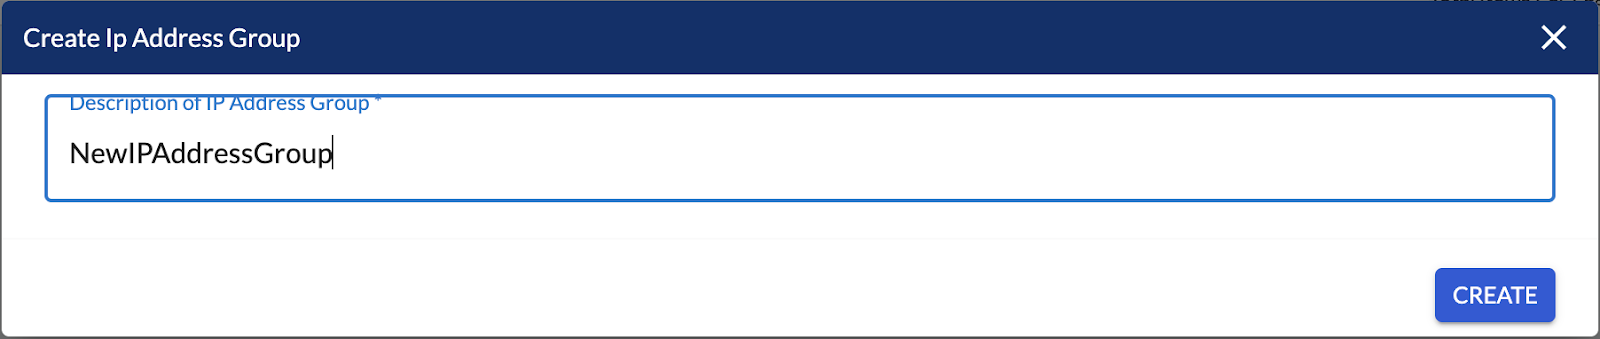
- Add a new IP address group:
- From the IP Address Groups section click on
- In the following dialog enter the name of the IP Address Group.
- Click on CREATE.
- From the IP Address Groups section click on
- Add an IP address:
- Select the
icon on the IP Address Group to open the IP Address list. Click on the plus sign to add a new IP address.
- Select the

- Type in a description of the IP Address for reference and choose the IP Address Type:
- Addresses can include the IP address, range, network, subnet, or prefix.
- IP Address Group is a group of IP addresses. Groups can be cascaded.
- Firewall is a special group including all the firewall's IP addresses.
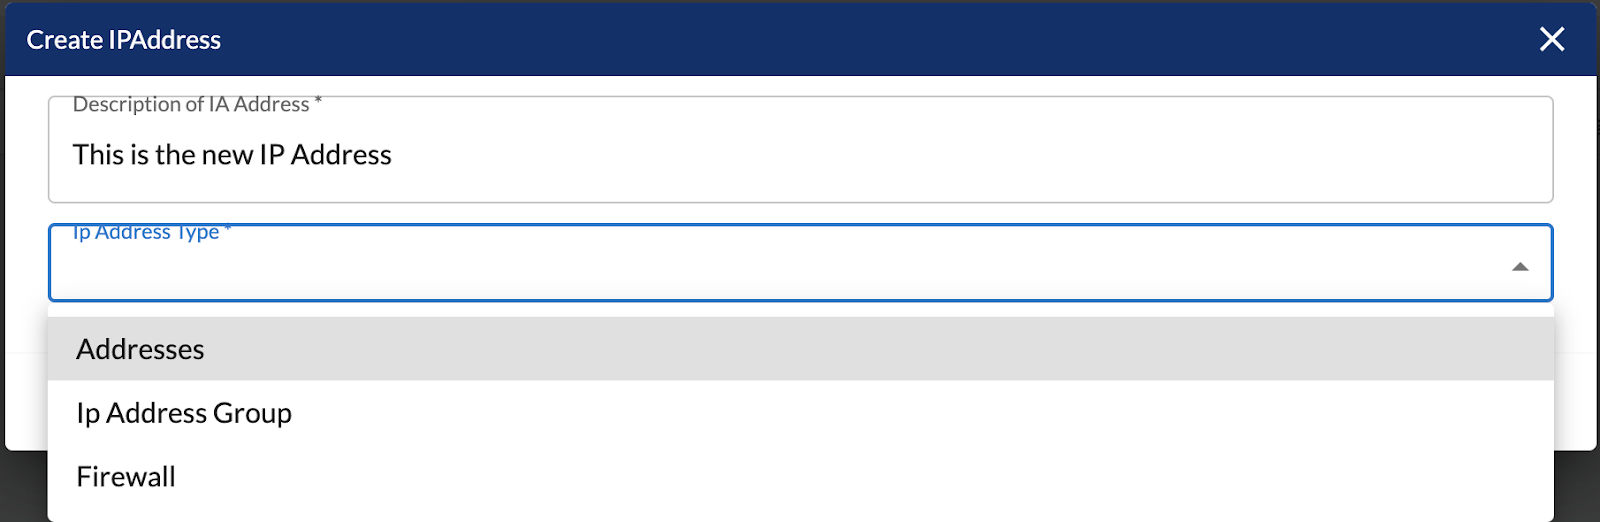
- Click Save to complete the process.
URL groups allow administrators to define different rules or configurations for a group of web pages rather than do it individually. A URL group rule is processed faster than a greater number of separate rules for individual URLs.
- Create URL Groups
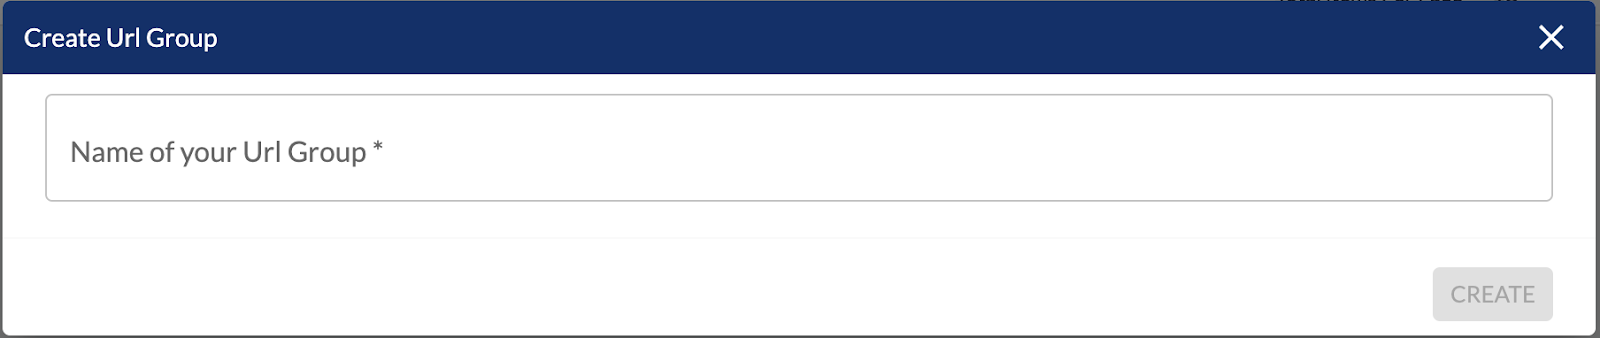
- From the URL Groups section click on
- In the following dialog enter the name of the URL Group.
- Click on CREATE.
- From the URL Groups section click on
- Add a URL
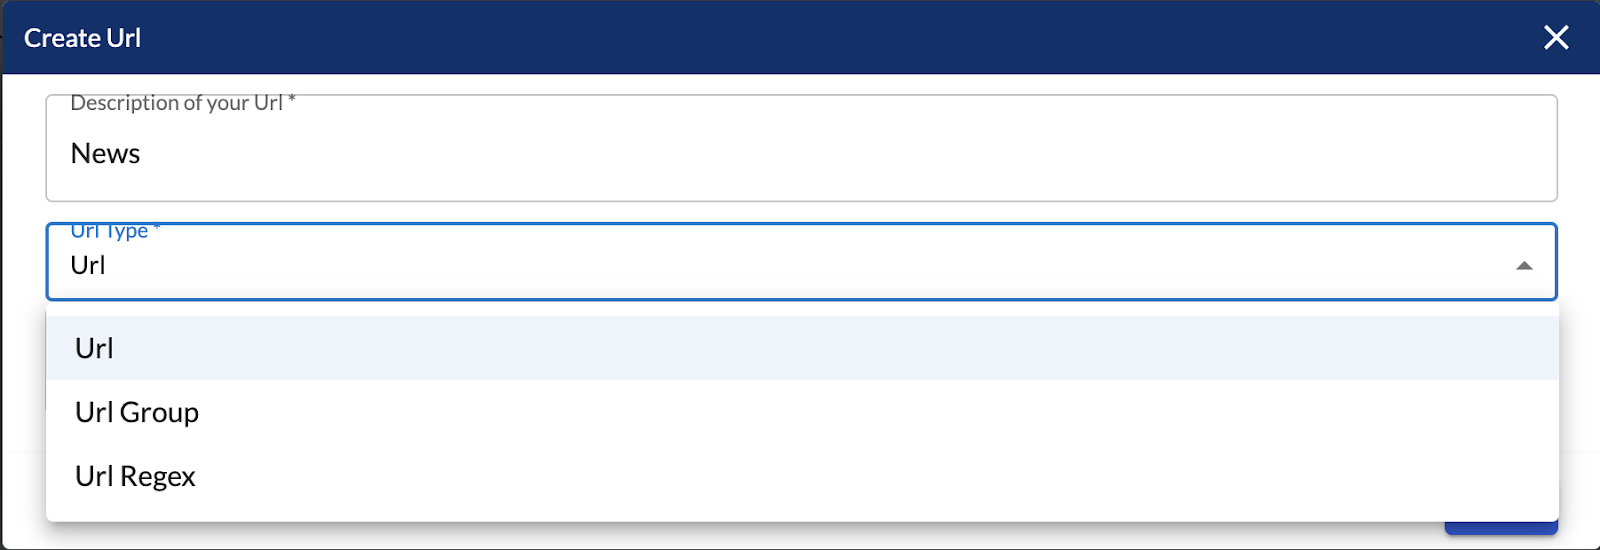
- Select the
- Select the

- Type in a description of the URL group and choose the URL type which can be specified as follows:
- Full address of a server, a document, or a web page (http://).
- Another URL group. Groups can be cascaded.
- Regular expressions
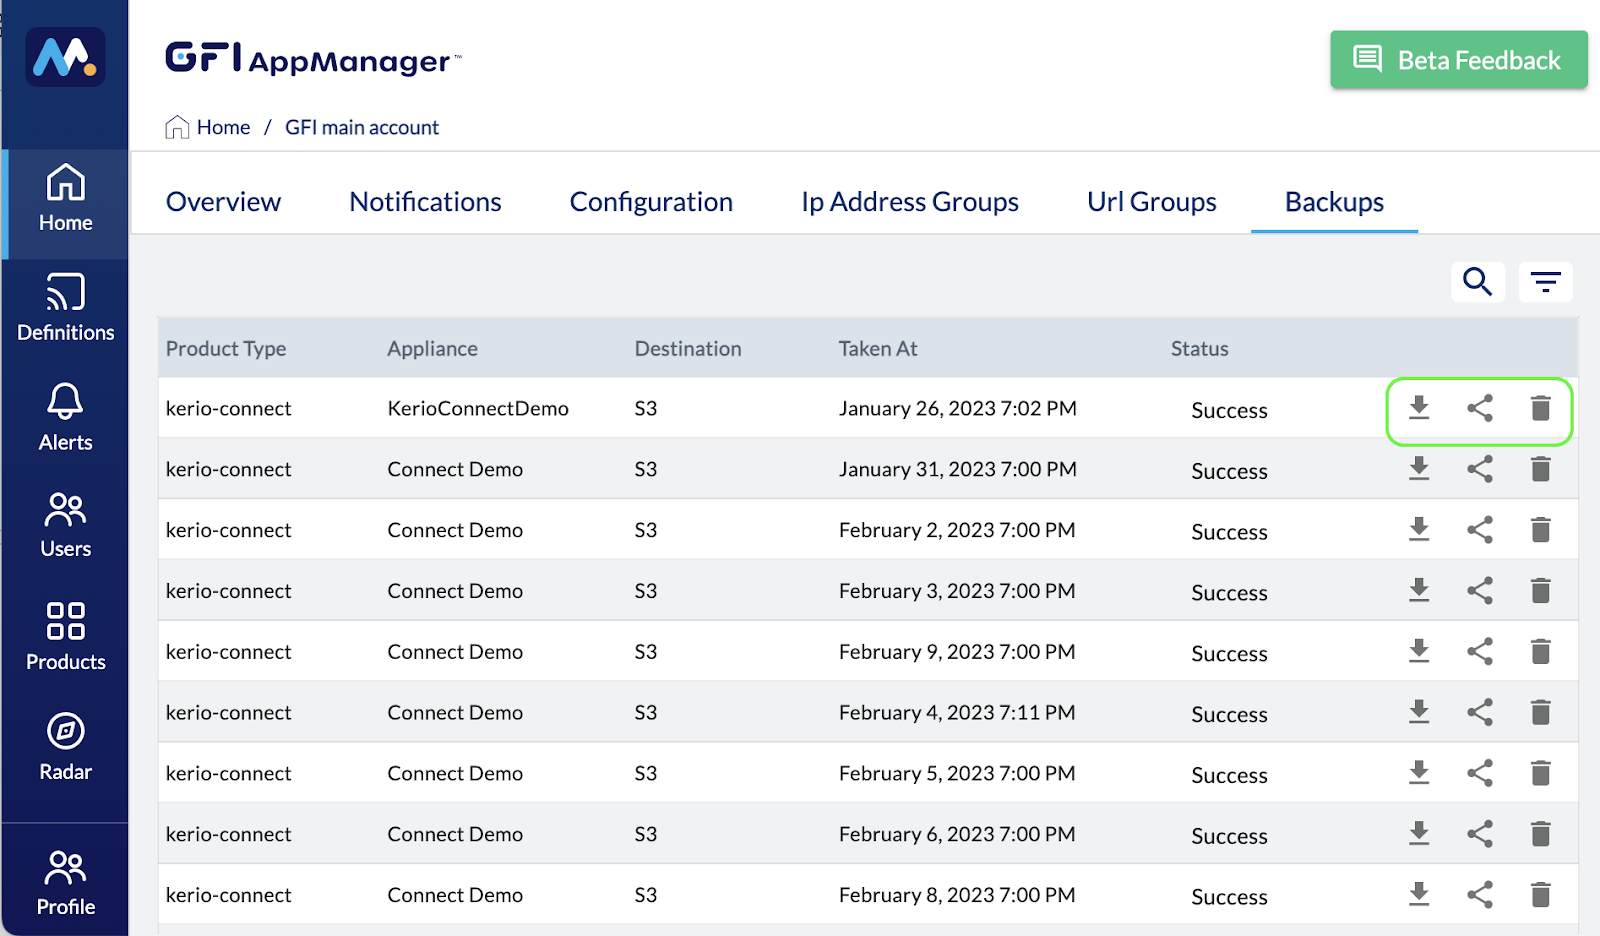
Your appliances’ configurations can be automatically backed up to AppManager. From the Backups tab, you can access the list of backups per appliance and download the configuration files backup that you need, share, or delete them.
Definitions
AppManager allows you to share definitions for IP address groups, and URL groups throughout the appliances that are managed by AppManager, and Account Groups and Appliance Groups can be used to define alerts and notifications.
Refer to the IP Address Groups section under Home on this page.
Refer to the URL Groups section under Home on this page.
Account groups can be created to manage accounts as a whole rather than individually and then these groups can be used to define alerts and notifications that will be applied to all the organizations that belong to them.
- Create account group
- From the Account Groups section click on
- In the following dialog enter the name of the Account Group.
- Select or type the accounts that will be part of this group.
- Click on SAVE.
- From the Account Groups section click on
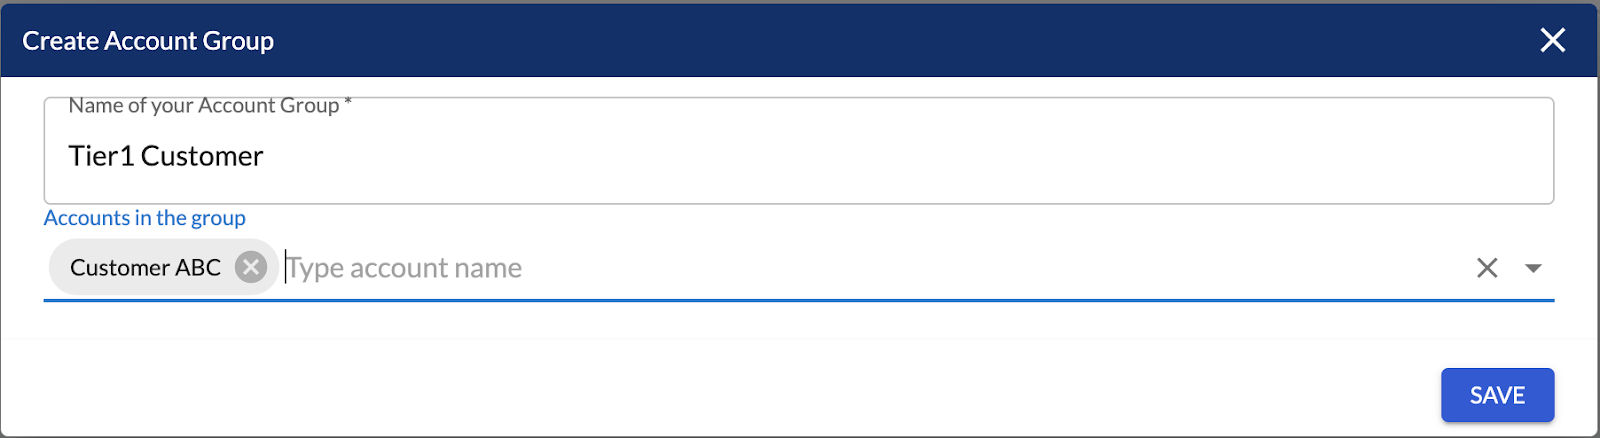
When the accounts have been created, they can be accessed for managing or deleted from this tab.

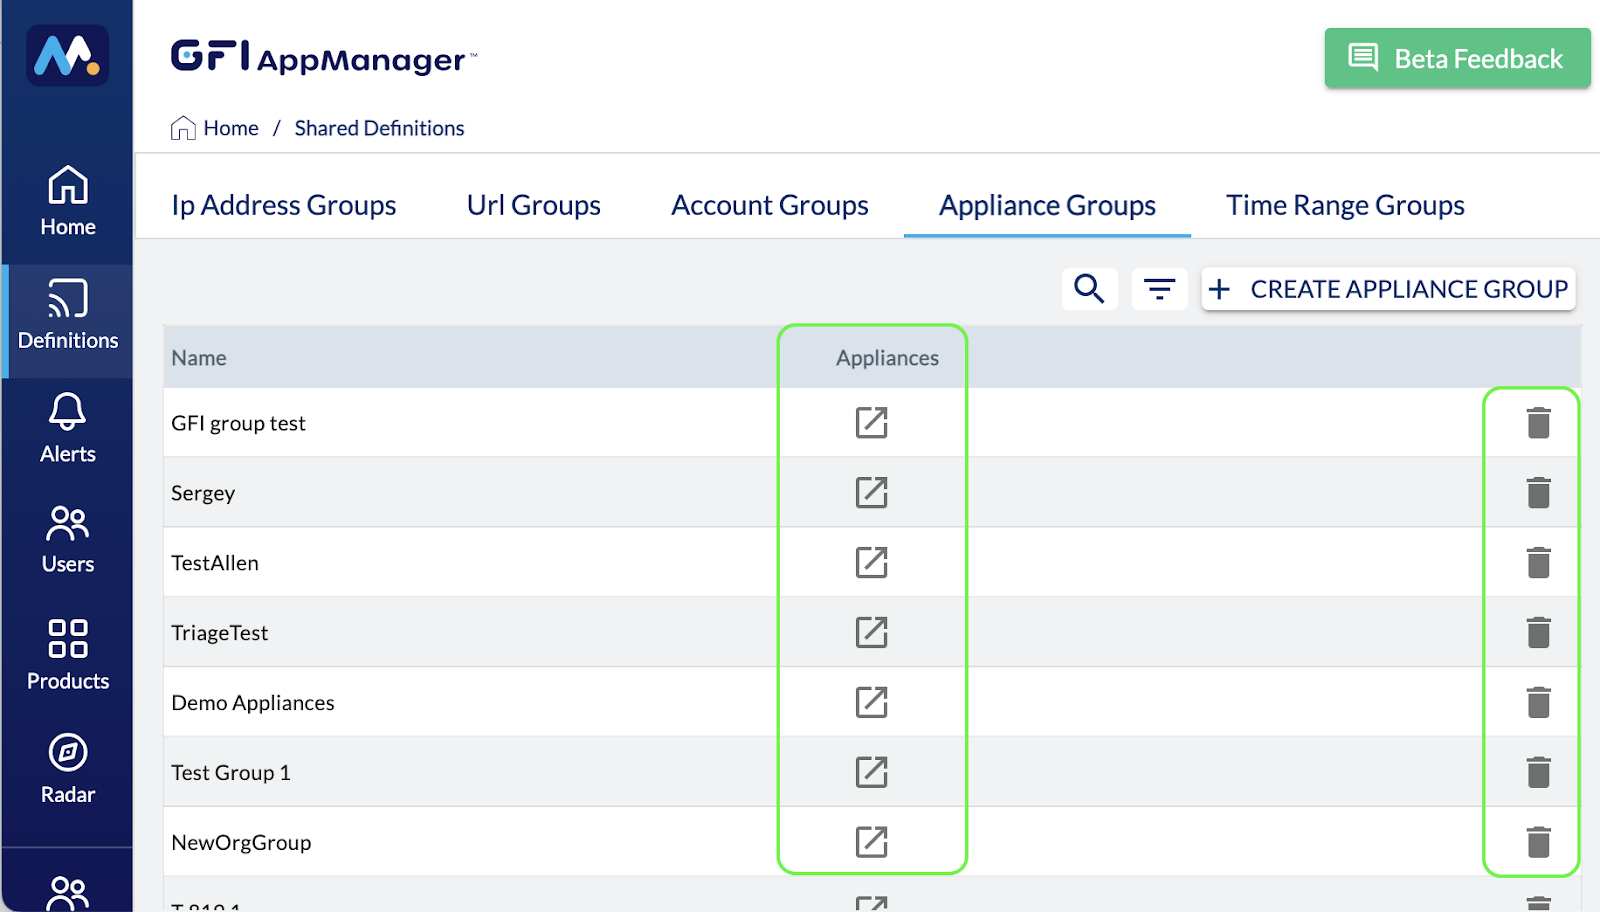
Appliance groups can be created to manage appliances as a whole rather than individually, for example, production appliances, or test appliances may be managed differently. These groups can be used to define alerts and notifications that will be applied to all the appliances that belong to them.
- Create an appliance group
- From the Appliance Groups section click on
- In the following dialog enter the name of the Appliance Group.
- Select the appliances that will be part of this group
- Click on SAVE.
- From the Appliance Groups section click on
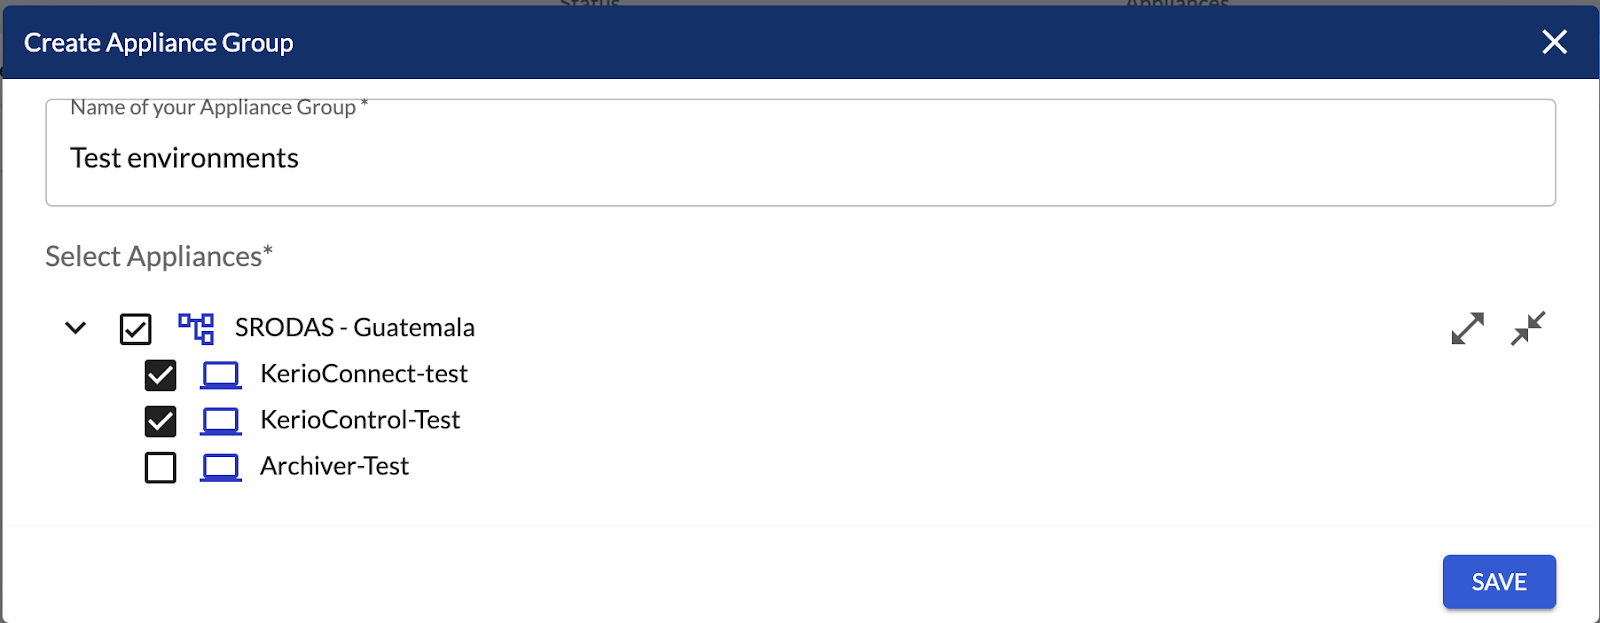
When the appliance groups have been created, they can be accessed for management or deleted from this tab.
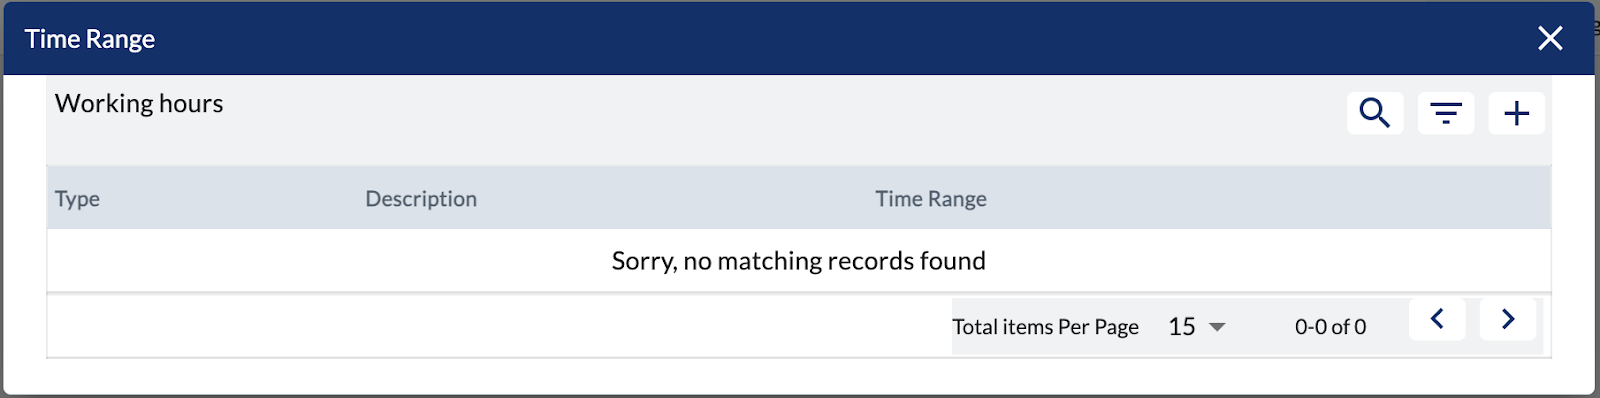
Time ranges define when Kerio Control rules should be valid. Each time range can consist of multiple time periods with different settings.
- Create a time range group
- From the Time Range Groups section click on
- In the following dialog enter the name of the Time Range Group.
- Click on CREATE
- From the Time Range Groups section click on
- Add a time range
- Select the
icon on the Time Range Group to open the Time Range list. Click on the plus sign to add a new Time Range.
- Select the
- Type in a description of the Time Range and other required information as shown in the dialog below:
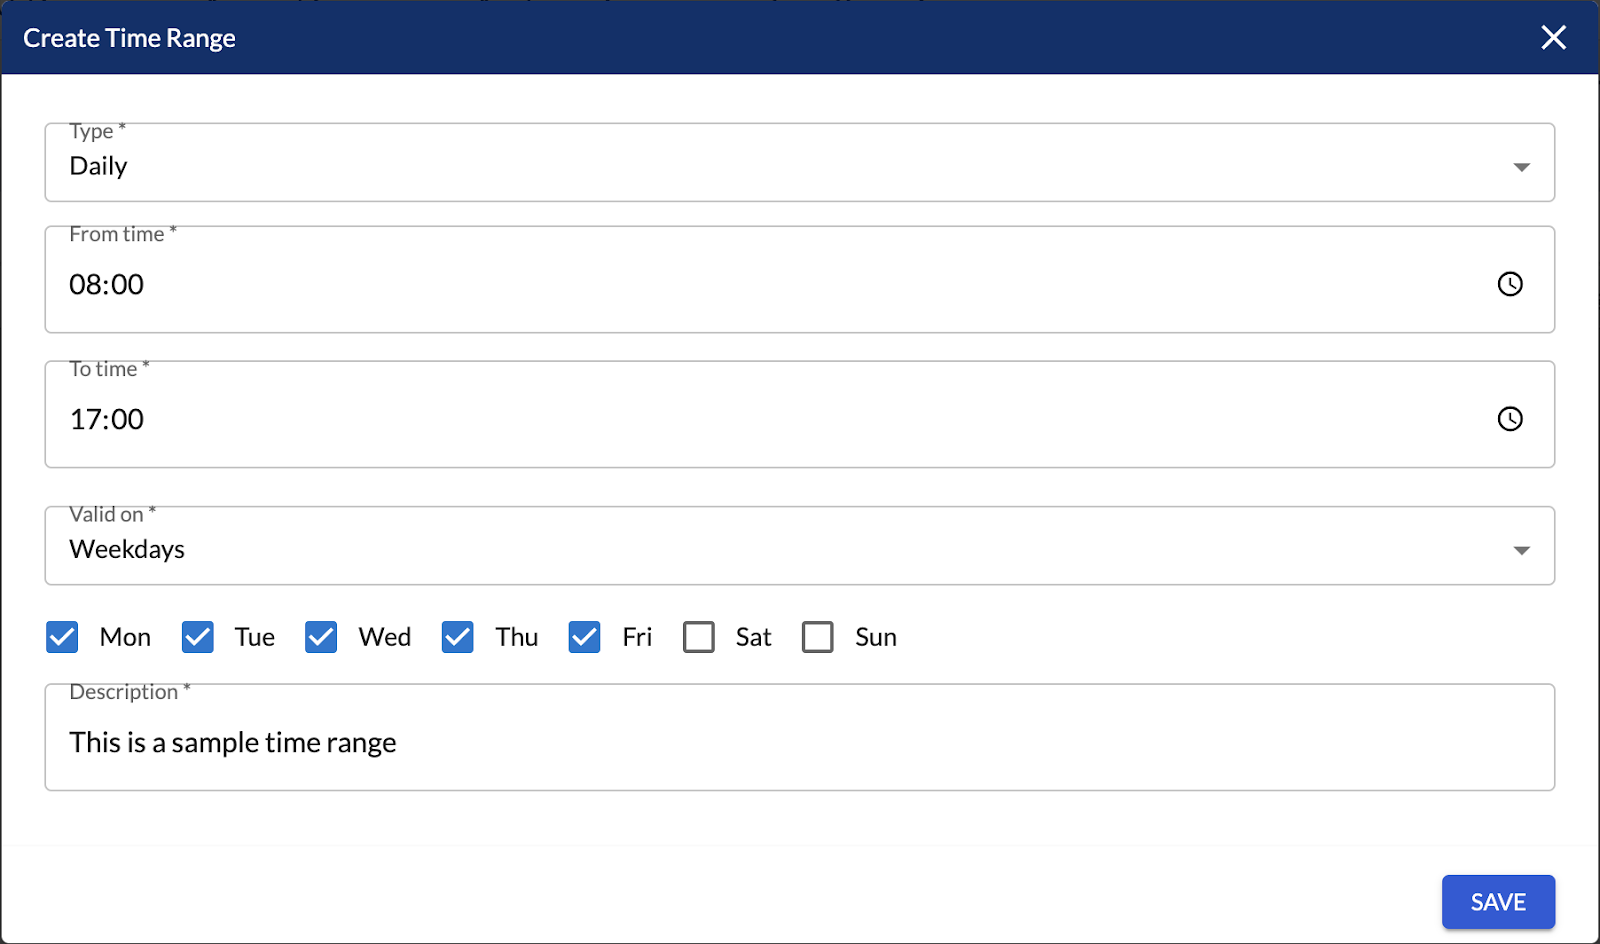
- Click on SAVE
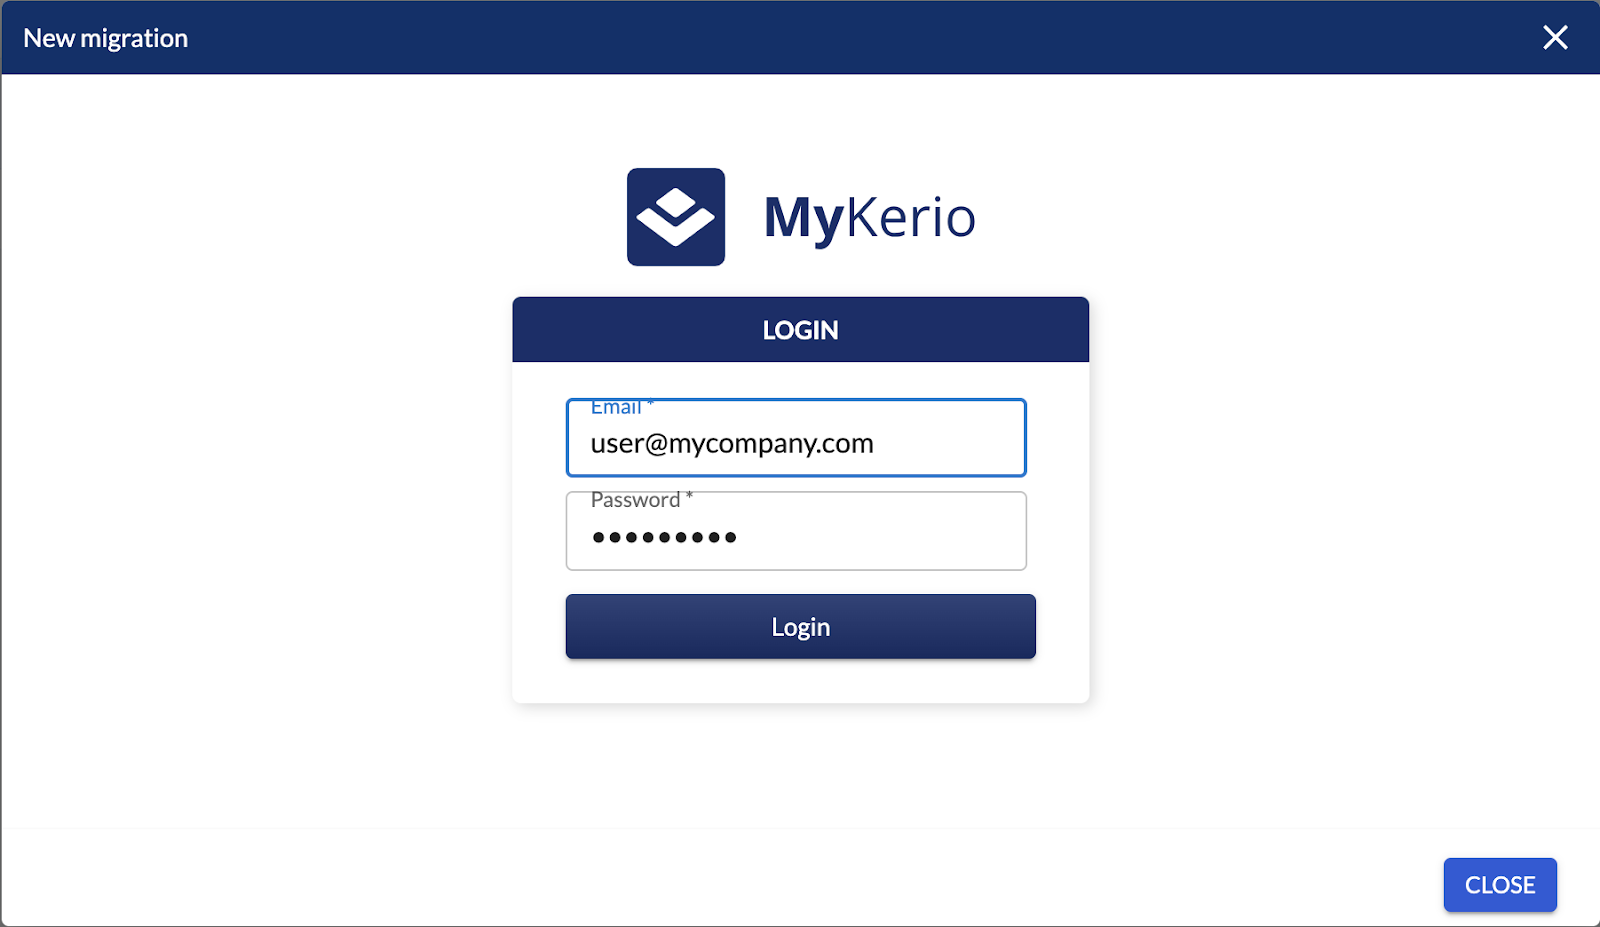
From this section administrators are able to migrate from MyKerio to GFI AppManager once the GFI KerioConnect and GFI KerioControl appliances have been upgraded to the compatible versions. MyKerio shared definitions can be transferred to AppManager with the following steps:
- Click the
and log in to MyKerio.
- Select the relevant Organization and hit “Start Sync.”
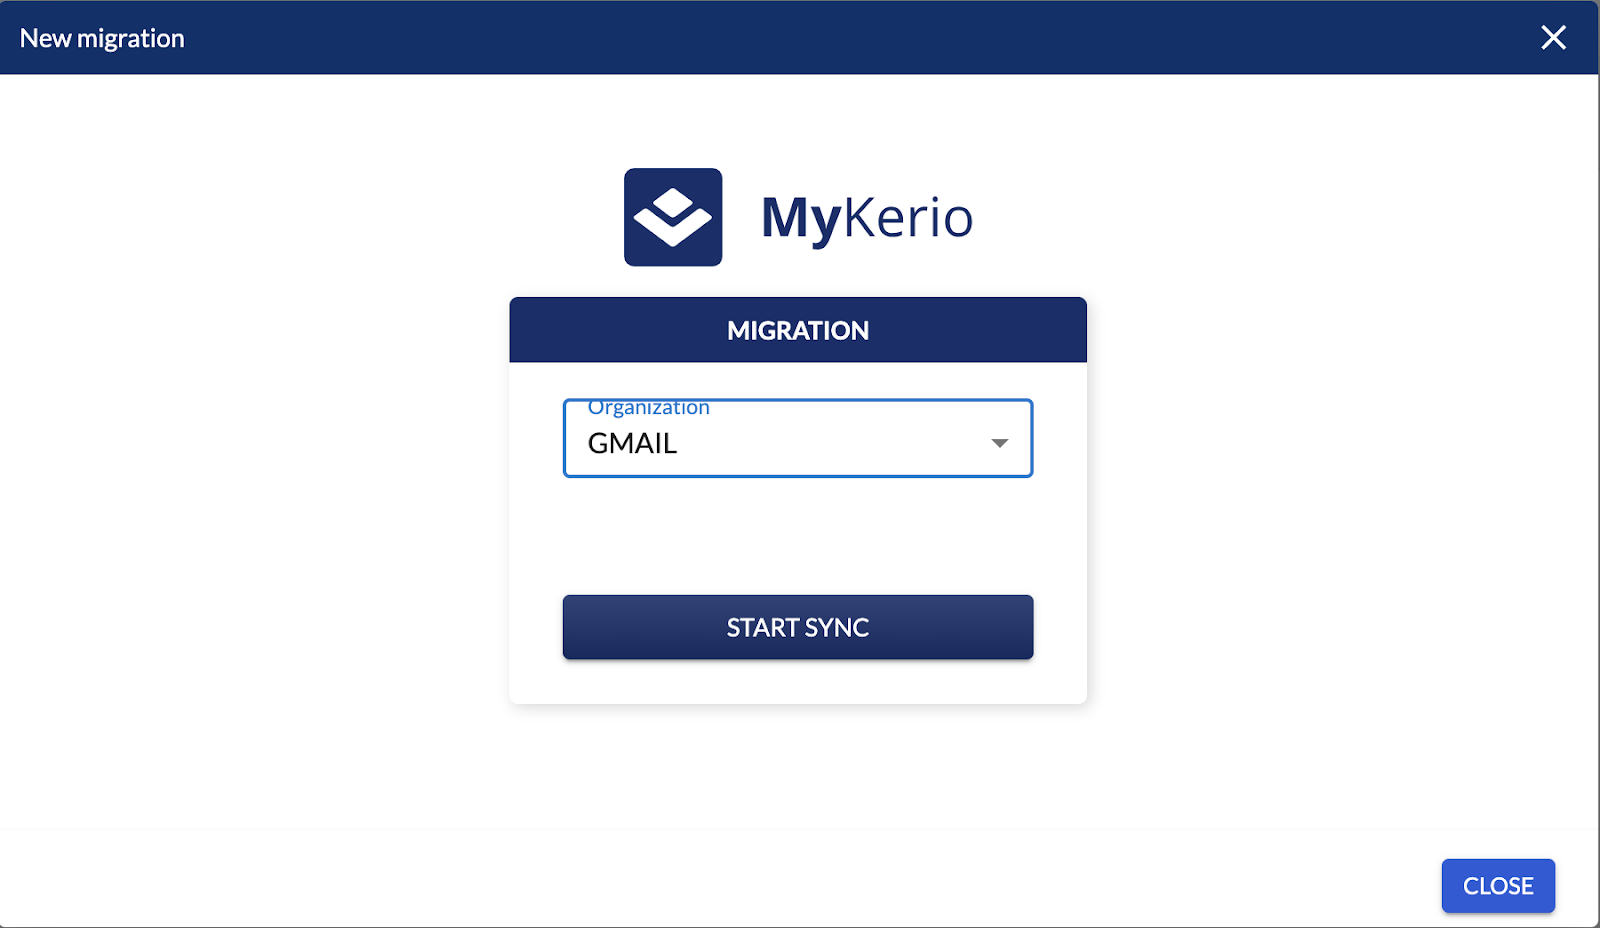
- GFI AppManager will then display the synced Shared Definitions.
If you have multiple MyKerio accounts, each of these accounts needs to be migrated individually. By clicking the "Start Sync" button, customers can transfer their MyKerio Shared Definitions to AppManager. However, migrating appliances and users will need to be done manually. For instructions on how to do this refer to the Getting Started section.
Alerts
Refer to the Notifications section under Home in this document.
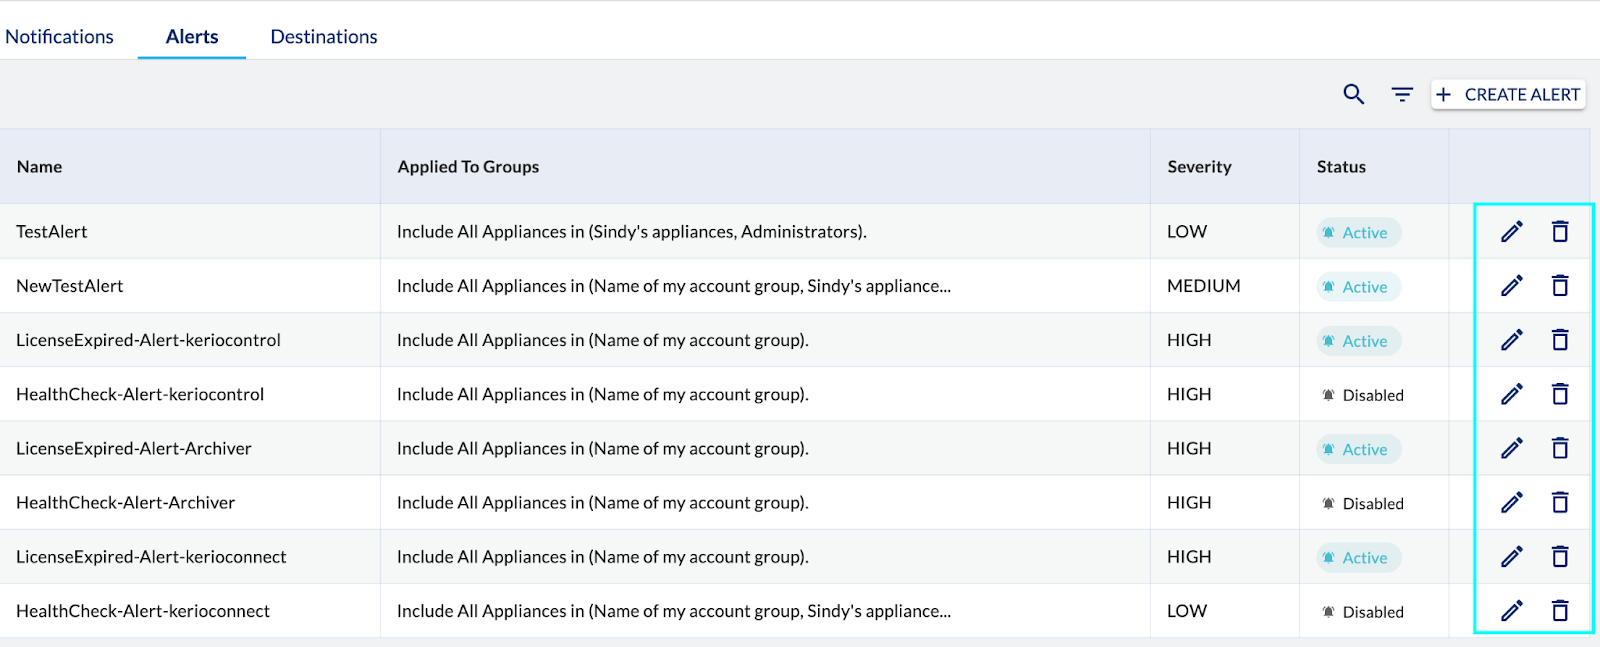
Alerts
Under the Alerts section, you will see a list of all the alerts that have been created including the name of the alert, the groups that it applies to, and the severity of the alert. From this section, you can edit existing alerts or create new ones.
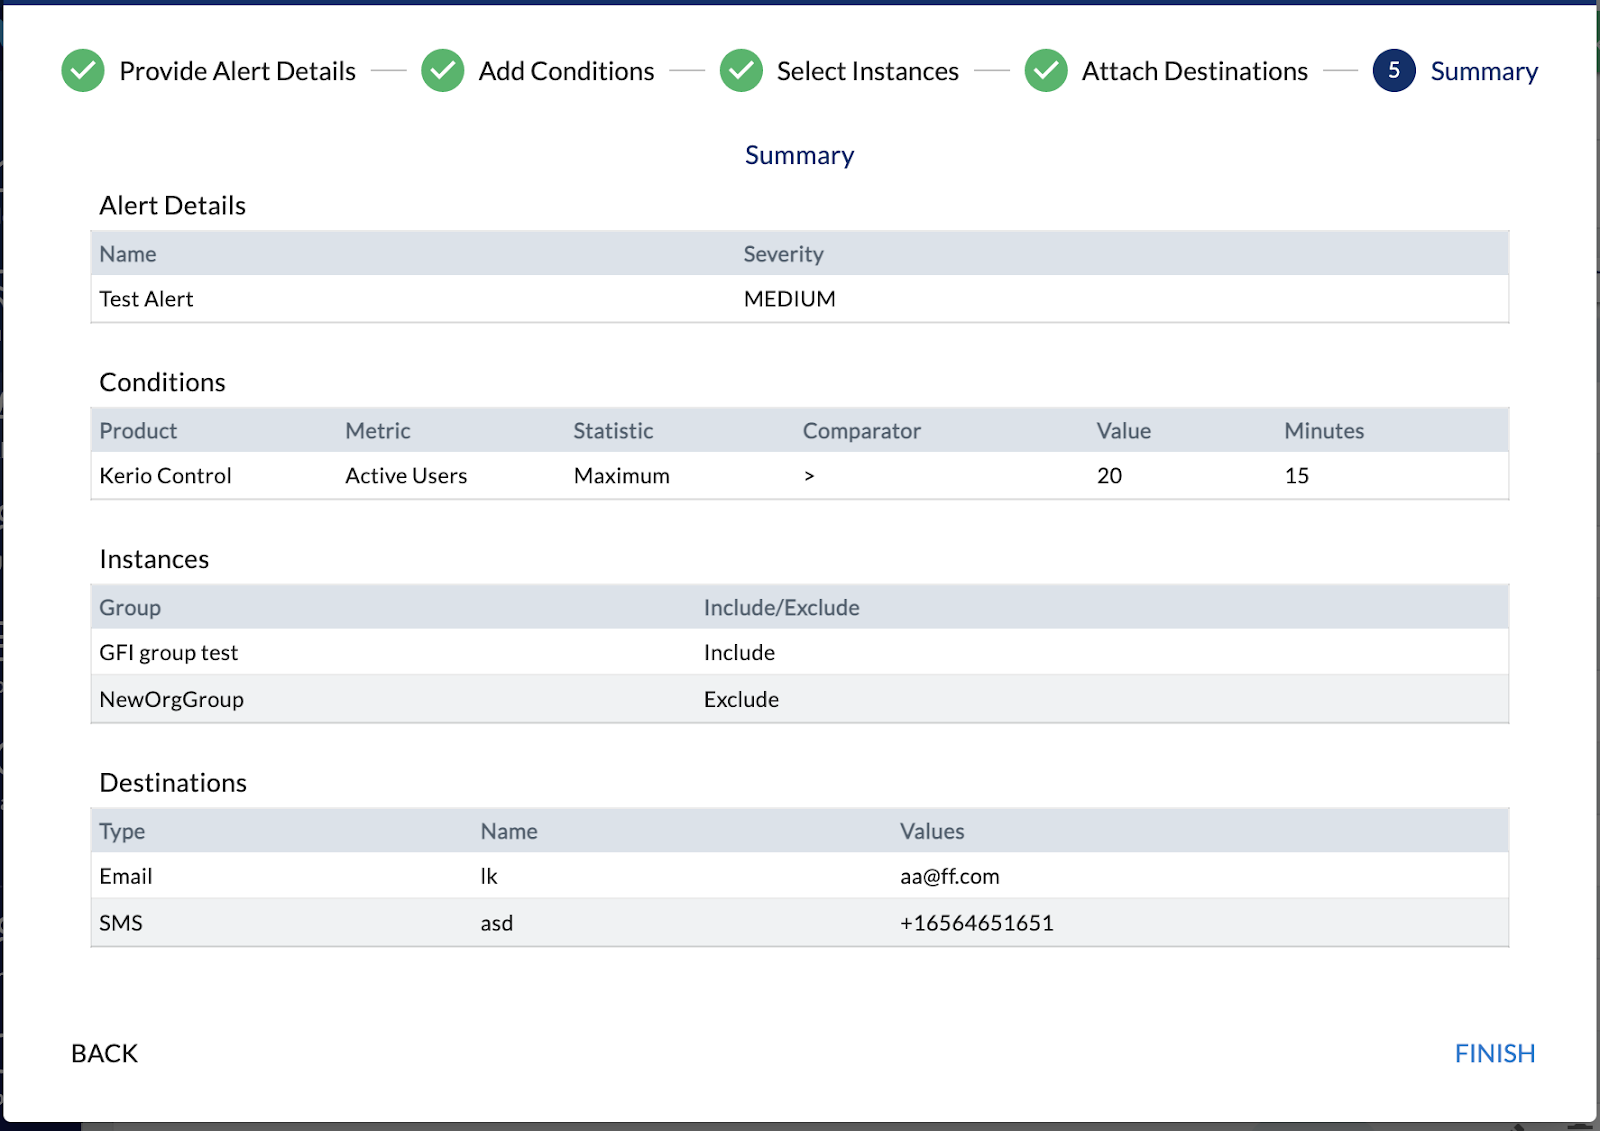
- Create Alerts
- From the Alerts section click on
- In the following dialog enter the name of the Alert and specify the severity level: Low, Medium, High, and Critical.
- From the Alerts section click on

- In the second step, we define the conditions that need to be met for the Alert to be triggered. Click on
to add a new condition. Multiple conditions can be defined with AND/OR logic that needs to be fulfilled for the Alert to be generated.
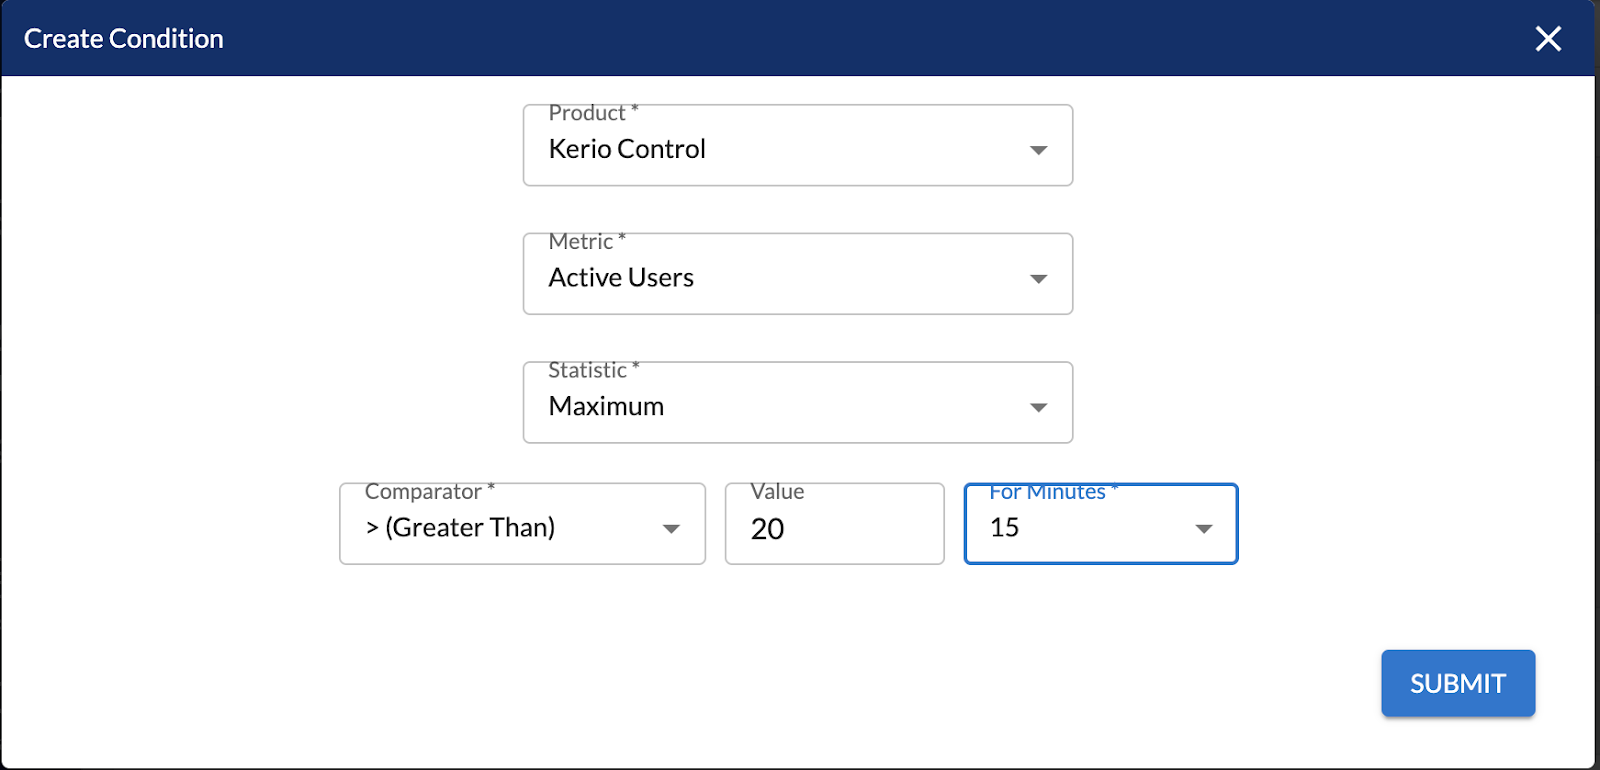
- Choose the product for which you are creating the condition.
- Choose the metric that you want to monitor and that will trigger the alert.
- Select the statistic you want to use: Minimum, maximum, average.
- Select the comparator, the value against which the statistic will be measured, and the length of time the condition should be valid for the alert to be triggered.
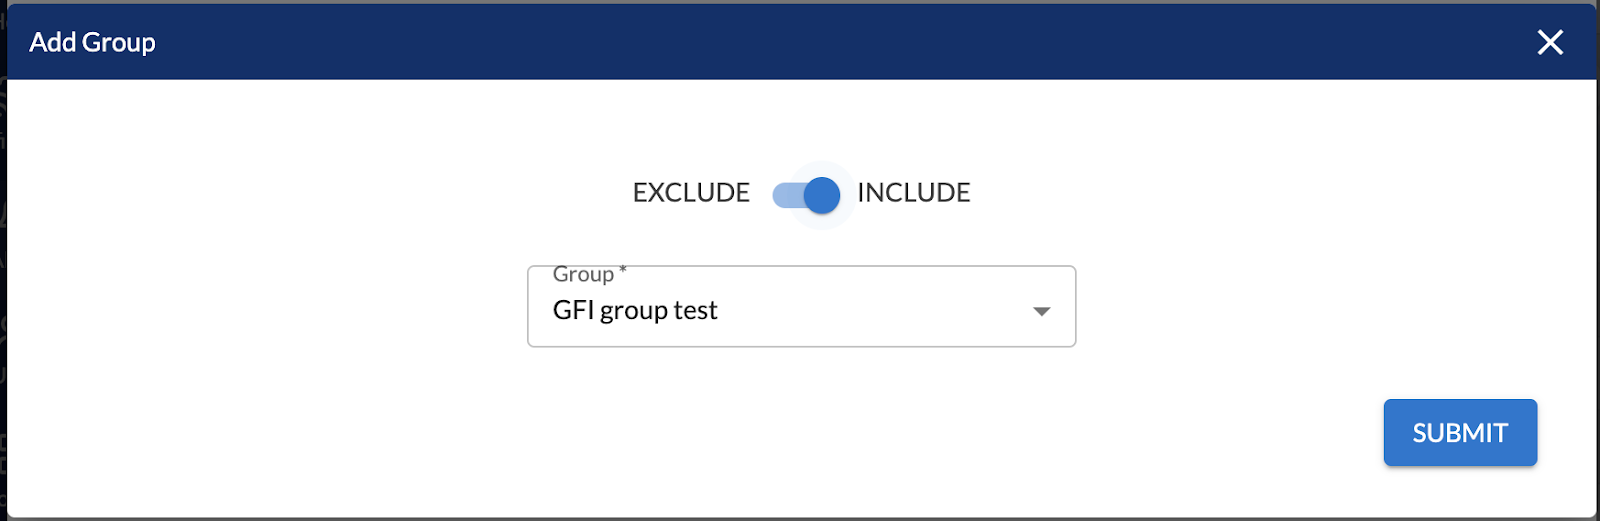
- In the next step, we select the appliances that need to meet the conditions defined to trigger the alert. Click on the
Here we can use Include/Exclude criteria for all the appliances that are part of the groups defined in the Appliance Groups section. Note that we can have multiple appliance groups in the same alert.
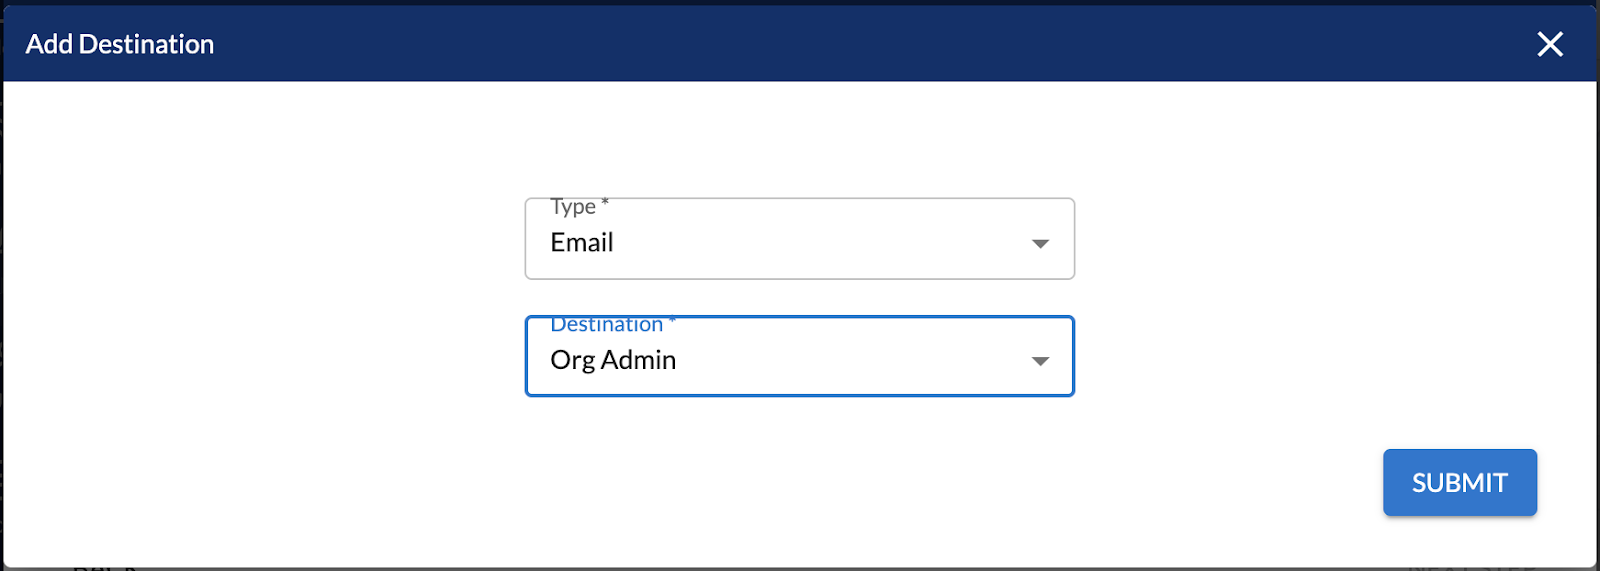
- Next, we choose the Destination, which indicates to the AppManager if it should send the notification by Email or by SMS, and which destinations should be included in the notification. Click on
Destinations are defined in the following section of this document.
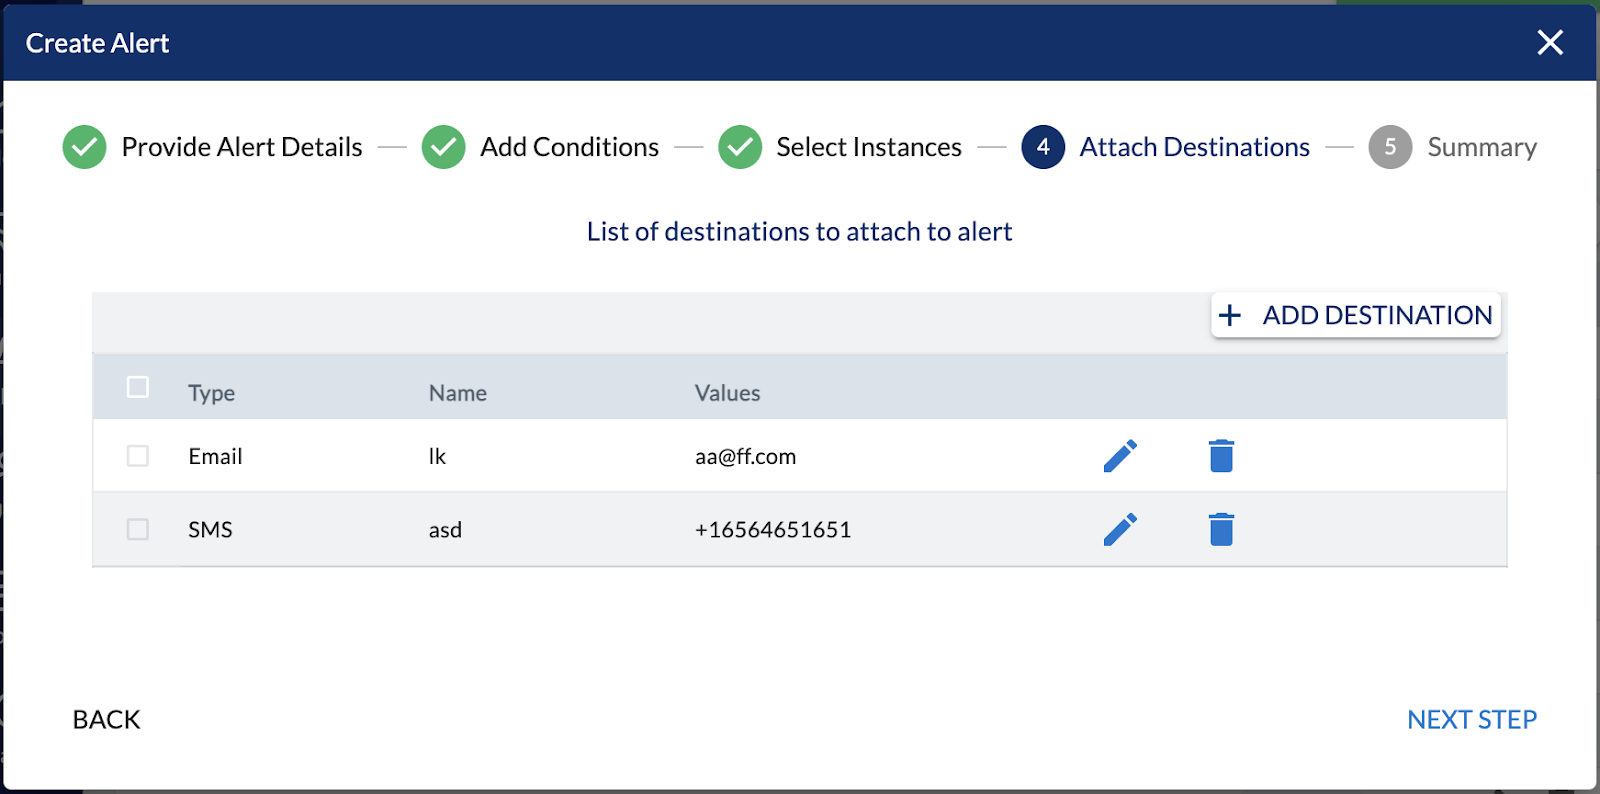
- The final section will show a summary of the alert. You can click on finish and the alert will be created.
Once the alerts have been created, you will be able to access them for editing or deletion from that same tab.
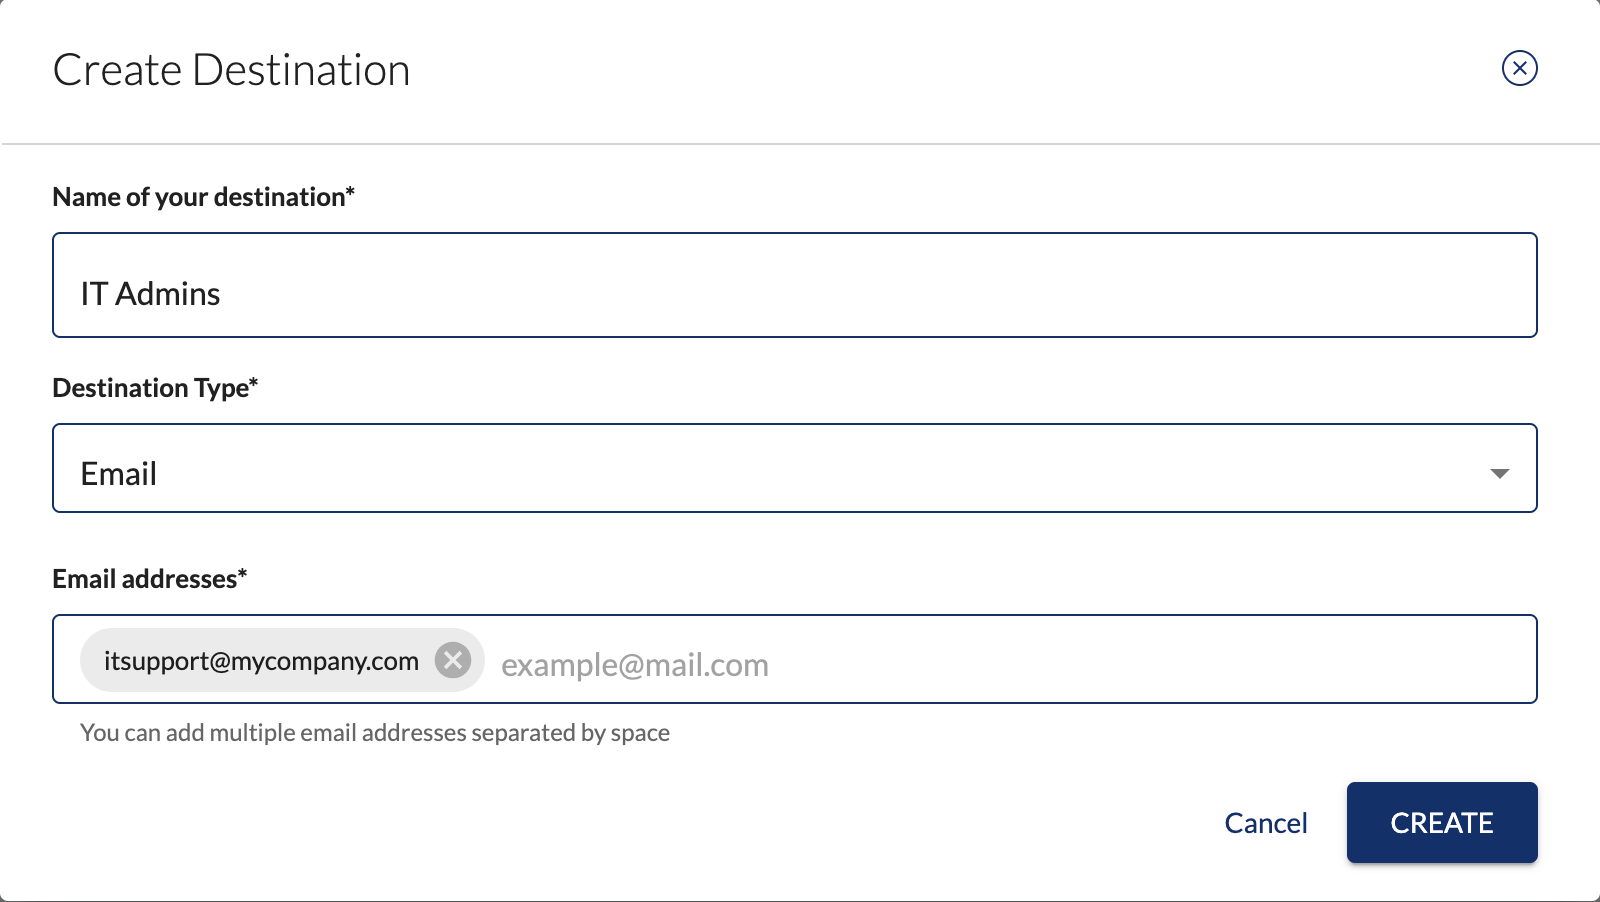
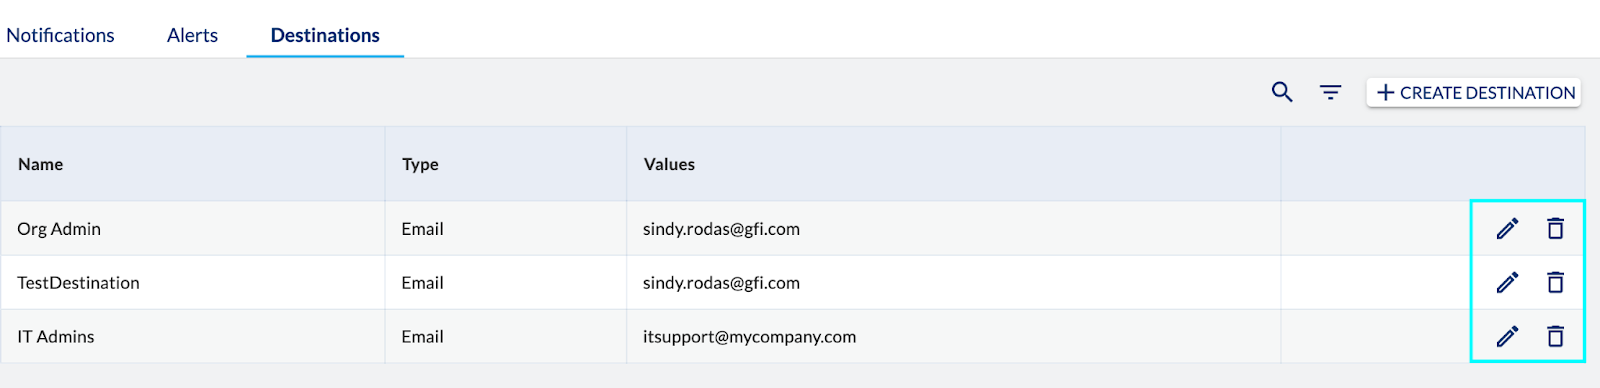
Destinations are used when creating Alerts, to indicate to the AppManager who should be notified whenever the alerts are triggered. From the Destinations section, you can see a list of the destinations that are already created and you can create more.
- Create a destination
- From the Account Groups section click on
- In the following dialog enter the name of the Destination.
- Select or type the destination: Email or SMS
- Click on Create
- From the Account Groups section click on
- Once a destination has been created, you will be able to access them for editing or deletion from that same tab.
Users
In the Users section, you can see the Users that have been invited to be part of the organization within the AppManager. You can see the First Name, Last Name, and Email of the users.
- Invite a user
- From the Users section click on
- In the following dialog enter the email address of the user and select the organization or account to which he will be granted access.
- Click on Submit
- From the Users section click on

- Once a User has been invited, you will be able to remove them from that same tab

From the News section you are able to access the Latest Product information.
Support
This is a string that uniquely identifies a GFI AppManager account. It is part of the URL used to access the cloud console.
For example: https://appmanager.gfi.com/organization/1234/dashboard the organization ID is 1234.
If any issues or inquiries arise regarding GFI AppManager, rest assured that our dedicated support team is readily available to assist. Prompt solutions can be obtained by opening a support case on our GFI AppManager Support website. Further resources, knowledge base articles, and FAQs can be accessed there as well. We are committed to resolving concerns and ensuring the utmost satisfaction with GFI AppManager, as customer success remains our top priority.